Nothing makes my husband, Hunter, and I happier than to fill our home with handmade creations. It’s really fun for us to put our (equally stubborn) heads together to figure out how to get a job done.
What’s unique about Hunter and I is the way we embrace how incredibly different we are from one another. I am right brained. He is left brained. I’m constantly thinking of ways to decorate (or redecorate) our house and really like to use my creativity to make things (ALL THE THINGS) by hand. He helps me with the handyman work and makes sure the job is done right. No matter whether we are working on a project or have to deal with life’s oh so beautiful obstacles, we are a TEAM – and we make a great one.
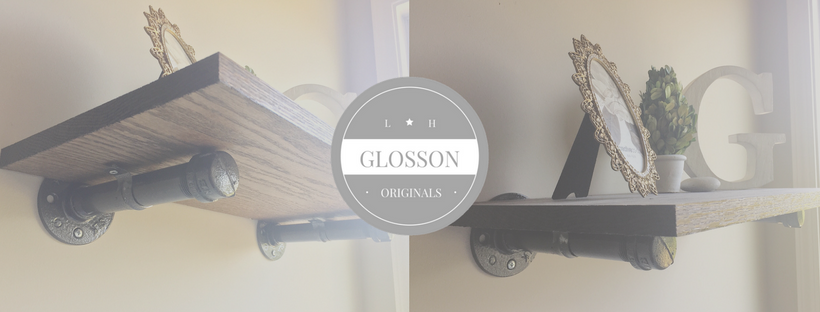
We actually made these shelves in another room in our house, first (you’ll see them in a later post). We liked them so much we made them again! One thing we love most about this project is how well it attractively transforms empty wall space into something useful. These particular shelves are in our master bathroom, which currently hold some simple and cute knickknacks to take up the empty space over our garden tub. However, down the road, they might hold some not-so-cute baby bathing essentials and toddler toys. Then again, they may just have to call the tub home. We’ll see when the time comes!


These rustic shelves would look stunning in almost any room of the house. For a true rustic look, using reclaimed wood is ideal, but you can also fake the distressed look with sanding and wood stain on pine or cedar boards. We went for the classic wood stain look on cedar, without any sanding. Take a look below for everything you’ll need to complete this project.
Materials
- Strong wood board material, such as Pine or Cedar, cut to the size of your choice (2)
- 3/4 in. galvanized pipe (4)
- 3/4 in floor flanges (4)
- 3/4 in. pipe caps (4)
- Wood stain of your choice (for this project we used Dark Walnut)
- Textured black spray paint
Tools
- Sponge brush for staining
- Power drill and screws
This project can take several hours up to a few days, depending on staining process, and requires an intermediate skill set.
Project Source: Maker Crate


I love these! I’m going to do some of these in the walk in closets in new house….I love how versatile they are, as well as attractive! Y’all did a great job!!
LikeLiked by 1 person
Thank you so much!
LikeLike
Loving your shelves! I have this diy on my bucket list to make!
I’d like to invite you to share this post and two others with us over at the DI & DI Link Party. I think our followers would love it. It just went live at 3 pm central time. Have a great week! http://www.rustic-refined.com
LikeLiked by 1 person
Thank you so much! I’m actually in the middle of making another shelf in my living room at the moment. I love them – you should really try it! Also, I would love to share my post – thanks!
LikeLike
A great creative day project. Looks super cool. So glad you shared it at DI&DI.
LikeLiked by 1 person
Thanks, Linda!
LikeLike